How to create a list and upload contacts?
Lists are how you organize contacts in SendFox. Here’s how to create a list and upload your contacts to it, plus the CSV format SendFox expects.
Create a list
- From the top nav, open Audience → Lists.
- Click Create List, give it a name, and save.
The Free plan includes up to 3 lists; Lifetime and Pro plans include more.
Upload your contacts
You can bring contacts in a few ways: upload a CSV file, paste them in, or import from MailChimp or Google.
- Start an import (open your list and choose to add contacts, or use the import option).
- Choose Import contacts from a CSV file and select your file.
- Map the columns if prompted, then confirm to add the contacts to your list.
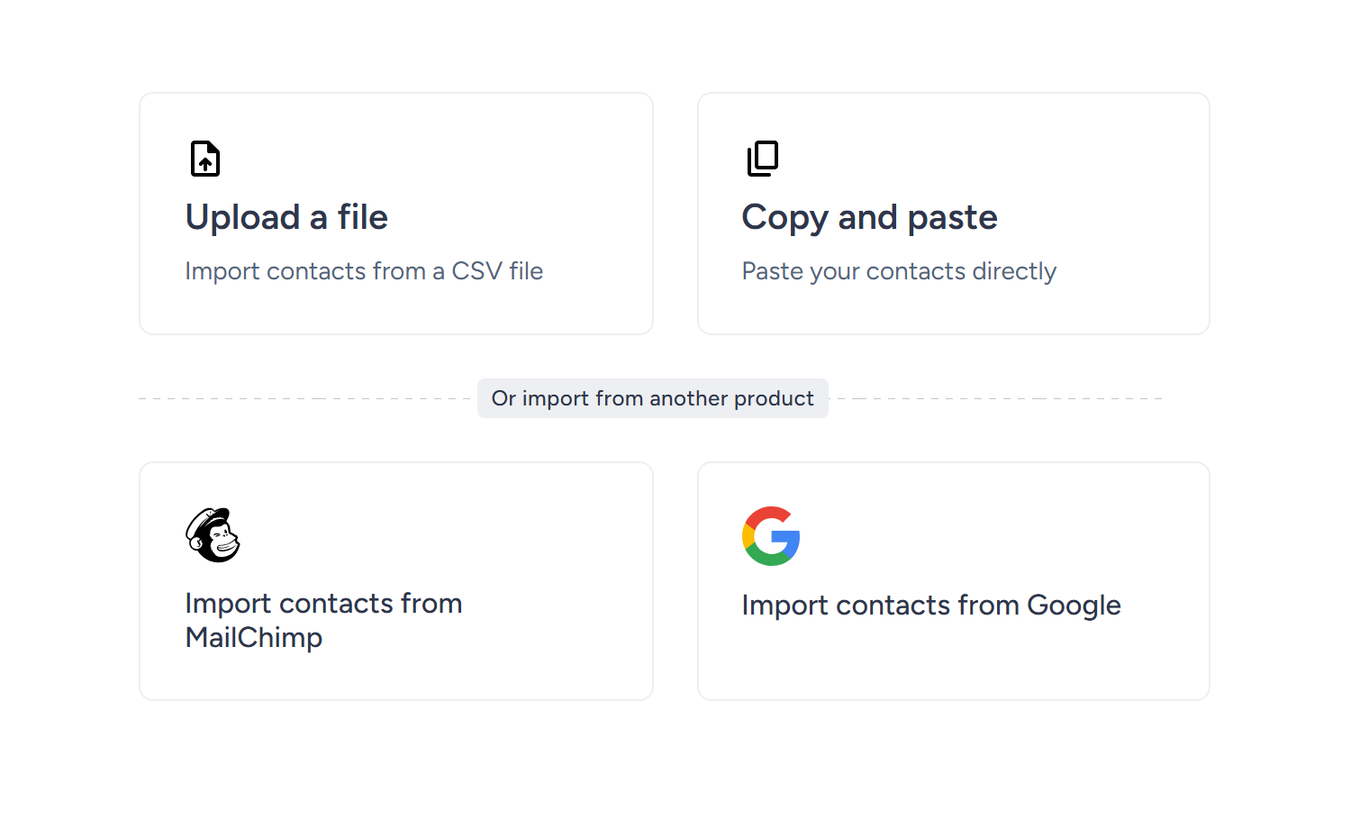
Importing from Google works the same way: after you connect your Google account, SendFox pulls in your Google contacts. You can create a new list or choose Select an existing list to add them to a list you already have. If SendFox can’t fetch your contacts, a Reconnect Google button appears — click it to refresh the connection and try again.
Prefer to watch? This short video walks through it:
Format your CSV
Your CSV should have a column for email, plus optional first name and last name columns. Here’s the expected layout:

SendFox stores one contact per email address, so duplicate rows are merged automatically. See duplicate contacts on upload.
Troubleshooting
My contacts didn’t import
- Make sure the file is a
.csvwith a column for email addresses. Re-check the column headers match the import mapping.
My Google contacts didn’t come through
- Click Reconnect Google to refresh the connection, then start the import again. Only Google contacts that have an email address are imported.
My import count looks low
- That’s expected if your file has repeated emails — each unique email becomes one contact. Imports also respect your plan’s contact limit.
Need a hand? Reach us through the Help Center.
Frequently asked questions
How many lists can I create?
Free includes up to 3 lists; Lifetime and Pro include more.
Can I add a CSV to a list I already have?
Yes. See uploading a CSV to an existing list.
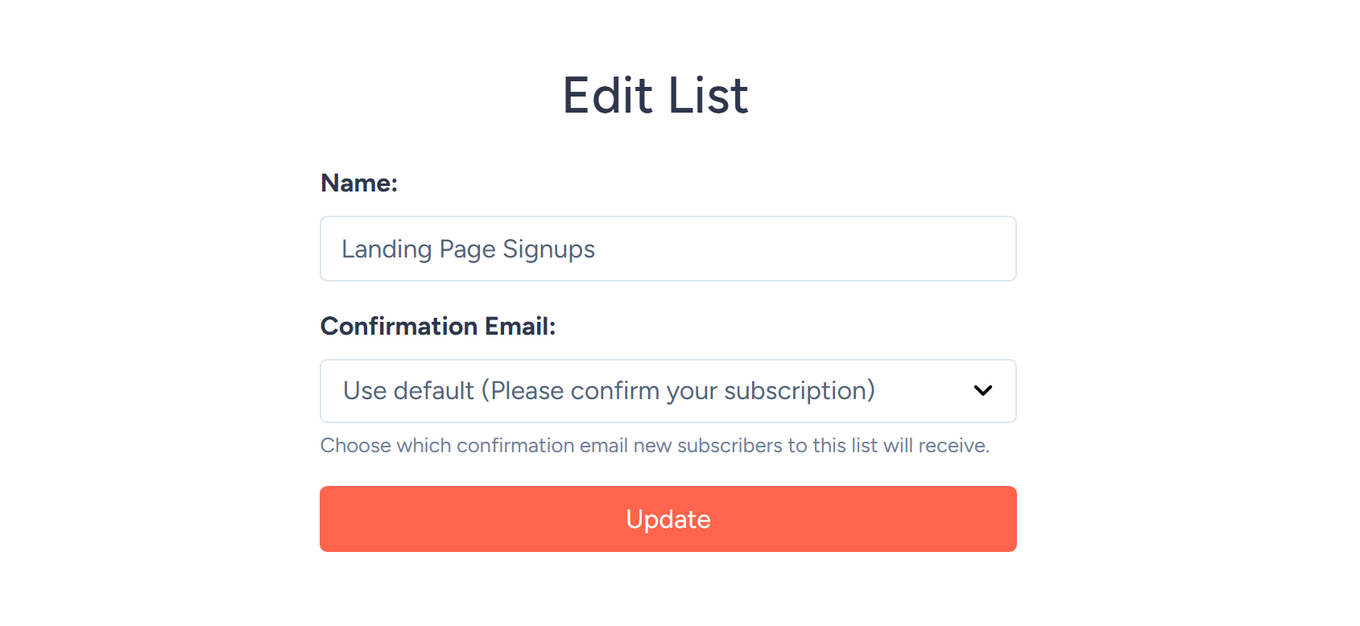
Can I choose which confirmation email a list sends?
Yes. If your account uses double opt-in, open Audience → Lists, edit a list, and choose from the Confirmation Email dropdown — new subscribers to that list receive the confirmation email you pick (or your default). You can create more than one confirmation email and assign a different one per list. See double opt-in.