How to switch from MailChimp?
Switching from MailChimp to SendFox takes three moves: import your contacts, then recreate your emails, automations, forms, and Smart Pages. This guide walks through each step.
1. Import your MailChimp contacts
SendFox can pull your contacts straight from MailChimp.
- From the top nav, open Audience → Lists and start an import (create or open a list and choose to add contacts).
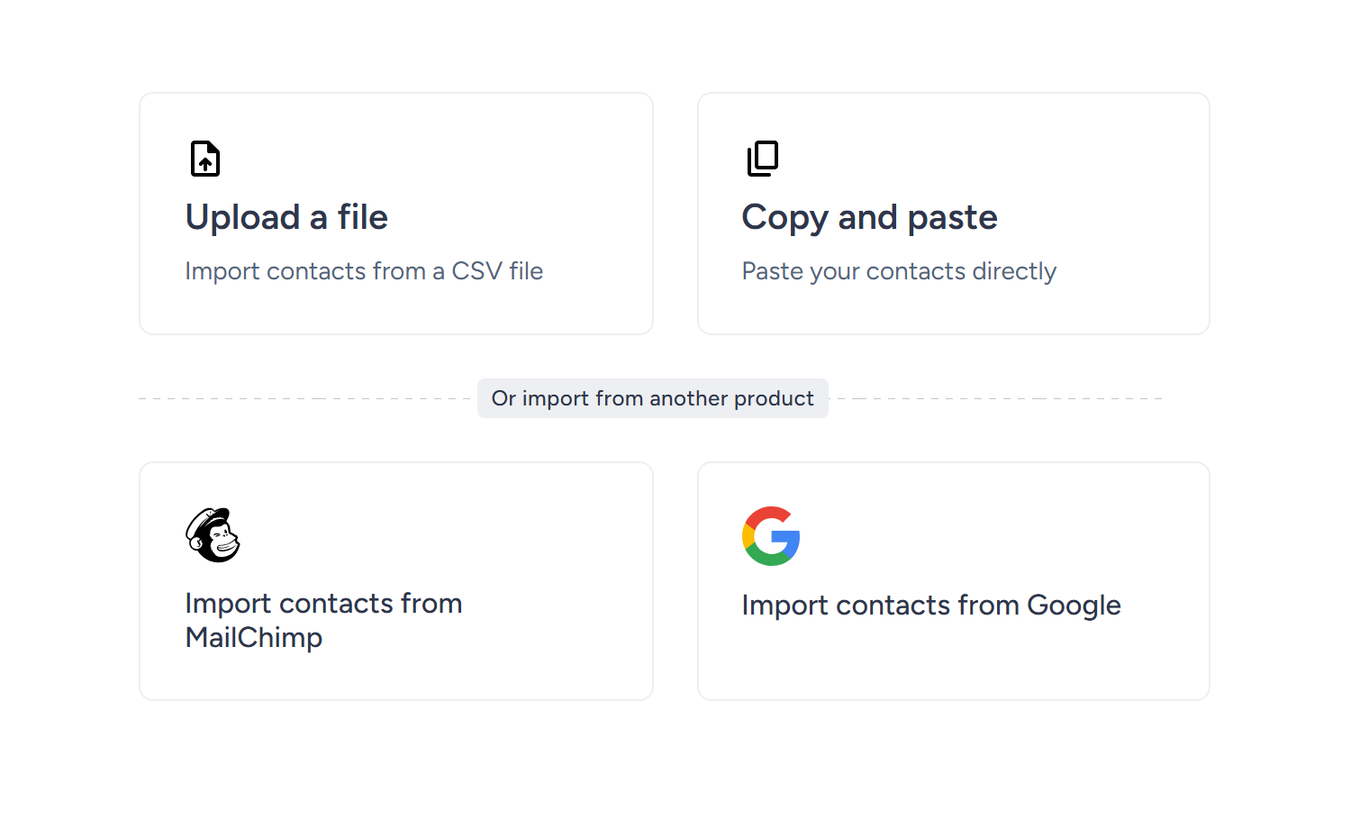
- In the import options, choose Import contacts from MailChimp.
- Authorize SendFox to connect to your MailChimp account when prompted.
- Select the MailChimp list you want to bring over, then confirm to create the list in SendFox.
Prefer not to connect MailChimp directly? You can also Import contacts from a CSV file — export your MailChimp audience to CSV and upload it instead. (SendFox also offers Import contacts from Google.)
2. Recreate your emails
SendFox’s editor is intentionally simpler than MailChimp’s block builder, so emails are recreated rather than imported wholesale.
- Open Emails in the top nav and click Create Email.
- Open the matching MailChimp campaign in another tab and copy your content across, section by section.
- Re-upload images directly to SendFox instead of pasting them — pasted images stay hosted by MailChimp and can break later. Save them to your computer, then upload them in SendFox.
- Update your personalization tags. SendFox uses
{{contact.email}},{{contact.first_name}}, and{{contact.last_name}}. - Set the from name, from email, subject, and the list you’re sending to, then save.
If formatting comes across messy, paste into a plain document first to strip MailChimp styling, then paste the clean text into SendFox.
3. Recreate your automations
- Open Automations in the top nav and click Create Automation.
- Choose the list whose new contacts should trigger the automation (import that list first — see step 1).
- Add an email step and draft each message, mirroring your MailChimp sequence one email at a time.
- Set the delay before each email, then save as you go so you don’t lose progress.
Need the full walkthrough? See How can I create an Automation?
4. Recreate your forms
- Open Growth → Forms and click Create Form.
- Rebuild the same fields you had in your MailChimp embedded form, then publish.
- Copy the embeddable code SendFox gives you and paste it onto your website in place of the old MailChimp form code.
For details, see How to create an embeddable HTML form?
5. Recreate your Smart Pages
- Open Growth → Smart Pages and click Create Smart Page.
- Copy your MailChimp landing page content into the page content, adjusting formatting as needed.
- Save and share your new Smart Page URL.
Troubleshooting
Images look broken after pasting
- Pasted images are still hosted by MailChimp. Download them, then re-upload them in SendFox so they live on your account.
Old links still point to MailChimp
- Check every link and update any that point to MailChimp-hosted pages, files, or forms. Host PDFs and documents elsewhere (for example, a cloud drive) and link to those.
Need a hand? Contact the SendFox team via the Help Center.
Frequently asked questions
Will SendFox import my contacts automatically?
Contacts can be imported directly from MailChimp (or by CSV). Emails, automations, forms, and Smart Pages are recreated in SendFox rather than imported.
What happens to duplicate contacts on import?
SendFox stores one contact per email address, so duplicates are merged automatically. See duplicate contacts on upload.